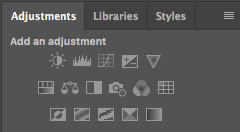
I've been asked a few times how my Metal gradient maps work. Once you've installed the .grd file to Photoshop, It's a pretty simple selection from the adjustment panel. The gradient can be placed right over your drawing.

As some of you know, I work occasionally in Grayscale. Having some grasp of values is crucial to getting the maps to work the way you want them to. It wont translate as well if you have a more flat or line based style.

These are pretty useful for quick metal effects or coloration. You can mask the metals to only show on selective parts of the artwork as well. This is great when Doing intricate jewelry designs or armor etc.

You can also adjust the intensity or appearance by adjusting the brightness and contrast of your values.
ADDITIONAL NOTE: Sometimes I place the silver gradient overtop any parts of my value work that I wish to appear metallic to quickly create the look and save rendering time as well, Not just as a final step. It makes a great base to paint on top of for things like latex or even a reflective silk type fabric.


